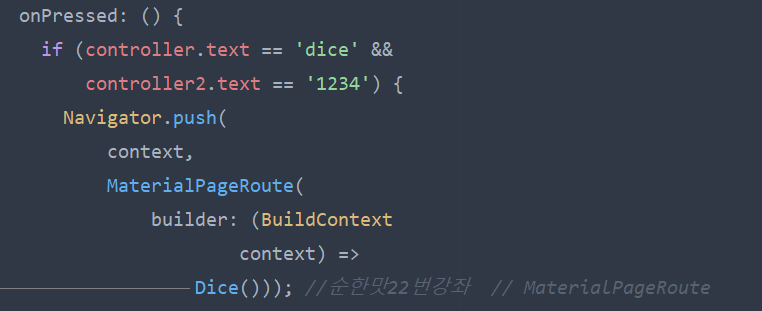
Future 클래스는 비동기 작업을 할 때 사용

Future는 일정 소요시간 후에 실제 데이터나 에러를 반환

async클래스는 await 메서드를 가지고 잇으며, await메소드로 선언된 메소드는 응답이 처리될 때까지 대기하는 동기식으로 처리가 가능(데이터를 수신해서 다음 과정을 처리할 때 사용)


1.1 일반적인 동기적 상황(Sync)

import 'dart:io';

void main(){
  showData();
}

void showData(){
  startTask();
  acessData();
  fetchData();
}

void startTask(){
  String info1 = '요청수행 시작';
  print(info1);
}

void acessData(){
  Duration time = Duration(seconds: 3);
  sleep(time);
  String info2 = '데이터에 접속중';
  print(info2);
}

void fetchData(){
  String info3 = '잔액은 8,500원 입니다.';
  print(info3);
}


1.2 일반적인 비동기적상황(Async)

import 'dart:io';

void main(){
  showData();
}

void showData(){
  startTask();
  acessData();
  fetchData();
}

void startTask(){
  String info1 = '요청수행 시작';
  print(info1);
}

void acessData(){
  Duration time = Duration(seconds: 3);

  if(time.inSeconds>2){
    //sleep(time);
    Future.delayed(time, (){
      String info2 = "데이터 처리 완료";
      print(info2);
    });
  }else{
    String info2 = "데이터를 가져왔습니다.";
    print(info2);
  }
}

void fetchData(){
  String info3 = '잔액은 8,500원 입니다.';
  print(info3);
}


2.1 비동기처리로 인한 문제 발생

fetch함수가 acessData()함수의 리턴값이 필요한 상황

import 'dart:io';

void main(){
  showData();
}

void showData(){
  startTask();
  String account = acessData();
  fetchData(account);
}

void startTask(){
  String info1 = '요청수행 시작';
  print(info1);
}

String acessData(){
  String account="";

  Duration time = Duration(seconds: 3);

  if(time.inSeconds>2){
    //async로 처리되는 부분
    Future.delayed(time, (){
      account = "8,500만원";
      print(account);
    });
  }else{
    String info2 = "데이터를 가져왔습니다.";
    print(info2);
  }
  return account;
}

void fetchData(String account){
  String info3 = '잔액은 $account원 입니다.';
  print(info3);
}


2.2 문제 해결

 - 우선 acessData함수는 비동기 함수로 Future.delayed함수가 리턴이 된 후 나머지 문장이 실행된다.

 - Future.delayed함수 안에서 account값이 할당이 되고  그 값을 리턴하는데 Future<string>타입이다.

   -> 리턴타입이 Future<string>라는 것은 일정 시간 후에 Future타입을 리턴하는데 이는 문자열을 의미/ 즉, 비동기 처리를 진행하고 일정 시간 후 string을 리턴한다는 뜻

 - Future<string>타입을 리턴하는 acessData함수는 결국 showData함수에서 호출되므로 showData함수도 비동기 처리를 해줘야 한다.

import 'dart:io';

void main(){
  showData();
}

void showData() async{
  startTask();
  String account = await acessData();
  fetchData(account);
}

void startTask(){
  String info1 = '요청수행 시작';
  print(info1);
}

Future<String> acessData() async{
  String account="";

  Duration time = Duration(seconds: 3);

  if(time.inSeconds>2){
    //async로 처리되는 부분
    await Future.delayed(time, (){
      account = "8,500만원";
      print(account);
    });
  }else{
    String info2 = "데이터를 가져왔습니다.";
    print(info2);
  }
  return account;
}

void fetchData(String account){
  String info3 = '잔액은 $account원 입니다.';
  print(info3);
}

코드 리팩토링이란?

코드를 유지 보수하기 좋게 바꾸는 것

가독성도 높일 수 있고 불필요한 중복을 피할 수 있다.
이는 결국 다른 사람과의 협업에도 도움이 된다.


참고: https://velog.io/@qkrtnfks128/Flutter-%EC%BD%94%EB%93%9C-%EB%A6%AC%ED%8C%A9%ED%86%A0%EB%A7%81refactoring


[Flutter] 코드 리팩토링(refactoring)

코드를 간결하게~~!!

velog.io


로그인 페이지를 통한 코드 리팩토링

main.dart

import 'package:flutter/material.dart';
import 'login_app/login.dart';

void main() {
  runApp(const MyApp());
}

class MyApp extends StatelessWidget {
  const MyApp({Key? key}) : super(key: key);

  @override
  Widget build(BuildContext context) {
    return MaterialApp(
      title: 'Firebase login app',
      home: LogIn(),
    );
  }
}


my_button.dart

유사한 모양의 버튼을 여러개 사용하는 상황에서 

MyButton이라는 클래스를 만들어서 변경요소인 image, text, color, radius, VoidCallback 함수 를 매개변수로 생성자를 호출하면 동일한 버튼을 찍어낼 수 있도록 함.

required 문법에 대한 이해 필요

import 'package:coderefactoring/login_app/login.dart';
import 'package:flutter/material.dart';

class MyButton extends StatelessWidget {
  MyButton({Key? key, required this.image, required this.text, required this.color, required this.radius, required this.onPressed}) : super(key: key);

  final Widget image;
  final Widget text;
  final Color color;
  final double radius;
  final VoidCallback onPressed;

  @override
  Widget build(BuildContext context) {

    return ButtonTheme(
      height: 50.0,
      child: ElevatedButton(
        child: Row(
          mainAxisAlignment: MainAxisAlignment.spaceEvenly,
          children: <Widget>[
            image,
            text,
            Opacity(
              opacity: 0.0,
              child: Image.asset('images/glogo.png'),
            ),
          ],
        ),
        style: ElevatedButton.styleFrom(
            backgroundColor: color
        ),
        onPressed: onPressed,
      ),
      shape: RoundedRectangleBorder(
        borderRadius: BorderRadius.all(
          Radius.circular(radius),
        ),
      ),
    );
  }
}


login.dart

MyButton객체를 이용해서 버튼을 쉽게 생성

import 'package:coderefactoring/my_button/my_button.dart';
import 'package:flutter/material.dart';

class LogIn extends StatelessWidget {
  const LogIn({Key? key}) : super(key: key);

  @override
  Widget build(BuildContext context) {
    return Scaffold(
      appBar: AppBar(
        backgroundColor: Colors.blue,
        title: Text(
          'Sign In',
          style: TextStyle(color: Colors.white),
        ),
        centerTitle: true,
        elevation: 0.2,
      ),
      body: buildButton(),
    );
  }

  Widget buildButton() {
    return Padding(
      padding: EdgeInsets.all(16.0),
      child: Column(
        mainAxisAlignment: MainAxisAlignment.center,
        children: <Widget>[
          MyButton(
              image: Image.asset('images/glogo.png'),
              text: Text(
                'Login with Google',
                style: TextStyle(color: Colors.black87, fontSize: 15.0),
              ),
              color: Colors.white,
              radius: 4.0,
              onPressed: () {}),
          SizedBox(
            height: 10.0,
          ),
          MyButton(
              image: Image.asset('images/flogo.png'),
              text: Text(
                'Login with Facebook',
                style: TextStyle(color: Colors.white, fontSize: 15.0),
              ),
              color: Color(0xFF334D92),
              radius: 4.0,
              onPressed: () {}),
          SizedBox(
            height: 10.0,
          ),
          MyButton(
              image: Icon(
                Icons.mail,
                color: Colors.white,
              ),
              text: Text(
                'Login with Email',
                style: TextStyle(color: Colors.white, fontSize: 15.0),
              ),
              radius: 4.0,
              color: Colors.green,
              onPressed: () {},
          ),

          SizedBox(
            height: 10.0,
          ),
        ],
      ),
    );
  }
}


1. Image.asset('경로')

2. Image(image: AssetImage('경로')


'플로터(Flutter) > CheetSheet' 카테고리의 다른 글

focus  (0) 2023.01.17
Flutter Snackbar사용법  (0) 2023.01.17


focus


참고

https://dev-gold.tistory.com/114


[Flutter]Focus and text fields 포커스 및 텍스트 필드

텍스트 필드가 선택되고 입력을 받을 수 있을 때, 포커스를 갖는다고 합니다 일반적으로, 사용자는 탭하여 텍스트 필드에 포커스를 이동시키고, 개발자는 아래 레시피에 설명되어있는 방식으로

dev-gold.tistory.com

https://velog.io/@sunwonsw95/Flutter-Focus-widget


[Flutter] Focus widget

모바일 앱의 다양한 입력필드를 보면 입력 필드에 포커스가 맞춰져 있는 동안 입력 필드 내 특정 아이콘이나 버튼, 텍스트가 활성화 되는 경우가 상당히 많다.나 역시 플러터의 TextFormField위젯을

velog.io


'플로터(Flutter) > CheetSheet' 카테고리의 다른 글

이미지 처리  (0) 2023.01.17
Flutter Snackbar사용법  (0) 2023.01.17


1. main.dart에서 우리가 눈여겨 볼 것은 총 3가지이다.

  가. 페이지이동


  나. Textfield 컨트롤

다. 스낵바 사용하기

 - 영상강좌에서는 SnackBar를 사용하기 위해 build위젯으로 감싸서 context를 만들어주는 부분이 있다 하지만 개선된 버전에서는 build위젯으로 감싸서 context를 만들어주는 부분이 필요없다.

빌더위젯으로 감싸지 않고 바로 처리
스낵바 구현 부분


main.dart

import 'package:flutter/material.dart';
import 'dice.dart';

void main() => runApp(MyApp());

class MyApp extends StatelessWidget {
  const MyApp({Key? key}) : super(key: key);

  @override
  Widget build(BuildContext context) {
    return const MaterialApp(
      debugShowCheckedModeBanner: false,
      title: 'Dice game',
      home: LogIn(),
    );
  }
}

class LogIn extends StatefulWidget {
  const LogIn({Key? key}) : super(key: key);

  @override
  State<LogIn> createState() => _LogInState();
}

class _LogInState extends State<LogIn> {
  TextEditingController controller = TextEditingController();
  TextEditingController controller2 = TextEditingController();

  @override
  Widget build(BuildContext context) {
    return Scaffold(
        appBar: AppBar(
          title: Text('Log in'),
          backgroundColor: Colors.redAccent,
          centerTitle: true,
          leading: IconButton(
            icon: Icon(Icons.menu),
            onPressed: () {},
          ),
          actions: [IconButton(onPressed: () {}, icon: Icon(Icons.menu))],
        ),
        body: GestureDetector(
          onTap: (){
            FocusScope.of(context).unfocus(); //키보드 없애기
          },
          child: SingleChildScrollView(
                //스크롤 뷰로 구성
                child: Column(
                  children: [
                    Padding(padding: EdgeInsets.only(top: 50)),
                    Center(
                        child: Image(
                      image: AssetImage('image/chef.gif'),
                      width: 170.0,
                      height: 190.0,
                    )),
                    Form(
                        child: Theme(
                            data: ThemeData(
                                primaryColor: Colors.teal,
                                inputDecorationTheme: InputDecorationTheme(
                                    labelStyle: TextStyle(
                                        color: Colors.teal, fontSize: 15.0))),
                            child: Container(
                              padding: EdgeInsets.all(40.0),
                              child: Column(
                                children: [
                                  TextField(
                                    autofocus: true,
                                    controller: controller,
                                    decoration: InputDecoration(
                                        labelText: 'Enter "dice"'),
                                    keyboardType: TextInputType.emailAddress,
                                  ),
                                  TextField(
                                    controller: controller2,
                                    decoration: InputDecoration(
                                        labelText: 'Enter Password'),
                                    keyboardType: TextInputType.text,
                                    obscureText: true,
                                  ),
                                  SizedBox(
                                    height: 40,
                                  ),
                                  ButtonTheme(
                                      minWidth: 100,
                                      height: 50,
                                      child: ElevatedButton(
                                          style: ElevatedButton.styleFrom(
                                              backgroundColor:
                                                  Colors.orangeAccent),
                                          onPressed: () {
                                            if (controller.text == 'dice' &&
                                                controller2.text == '1234') {
                                              Navigator.push(
                                                  context,
                                                  MaterialPageRoute(
                                                      builder: (BuildContext
                                                              context) =>
                                                          Dice())); //순한맛22번강좌
                                            } else if (controller.text !=
                                                    'dice' &&
                                                controller2.text == '1234') {
                                              showSnackBar2(context);
                                            } else if (controller.text ==
                                                    'dice' &&
                                                controller2.text != '1234') {
                                              showSnackBar3(context);
                                            } else {
                                              showSnackBar(context);
                                            }
                                          },
                                          child: Icon(Icons.arrow_forward,
                                              color: Colors.white, size: 35.0)))
                                ],
                              ),
                            )))
                  ],
                ),
              ),
        )
        );
  }
}

void showSnackBar(BuildContext context) {
  ScaffoldMessenger.of(context).showSnackBar(SnackBar(
    content: Text(
      '로그인 정보를 다시 확인하세요.',
      textAlign: TextAlign.center,
    ),
    duration: Duration(seconds: 2),
    backgroundColor: Colors.blue,
  ));
}

void showSnackBar2(BuildContext context) {
  ScaffoldMessenger.of(context).showSnackBar(SnackBar(
    content: Text(
      '비밀번호가 일치하지 않습니다.',
      textAlign: TextAlign.center,
    ),
    duration: Duration(seconds: 2),
    backgroundColor: Colors.blue,
  ));
}

void showSnackBar3(BuildContext context) {
  ScaffoldMessenger.of(context).showSnackBar(SnackBar(
    content: Text(
      'dice의 철자를 확인하세요.',
      textAlign: TextAlign.center,
    ),
    duration: Duration(seconds: 2),
    backgroundColor: Colors.blue,
  ));
}

dice.dart

- fluttertoast사용

import 'package:flutter/material.dart';
import 'dart:math';
import 'package:fluttertoast/fluttertoast.dart';

class Dice extends StatefulWidget {
  const Dice({Key? key}) : super(key: key);

  @override
  State<Dice> createState() => _DiceState();
}

class _DiceState extends State<Dice> {
  int leftDice = 1;
  int rightDice = 2;

  @override
  Widget build(BuildContext context) {
    return Scaffold(
      backgroundColor: Colors.redAccent,
      appBar: AppBar(
        backgroundColor: Colors.redAccent,
        title: Text('Dice Game'),
      ),
      body: Center(
        //center위젯 안에서 Column이나 Row를 사용할 때
        //중앙 정렬하려면 MainAxisAlignment.center사용
        //순한맛강좌 21강
        child: Column(
          mainAxisAlignment: MainAxisAlignment.center,
          children: [
            Padding(
              padding: const EdgeInsets.all(32),
              child: Row(
                children: [
                  //Expanded위젯은 컬럼이면 세로로 로우면 가로로 꽉 채움
                  Expanded(child: Image.asset('image/dice$leftDice.png')),
                  SizedBox(
                    width: 20,
                  ),
                  Expanded(child: Image.asset('image/dice$rightDice.png')),
                ],
              ),
            ),
            SizedBox(
              height: 60,
            ),
            ButtonTheme(
              child: ElevatedButton.icon(
                style: ElevatedButton.styleFrom(
                    backgroundColor: Colors.orangeAccent,
                    minimumSize: Size(100, 60)),
                onPressed: () {
                  setState(() {
                    leftDice = Random().nextInt(6)+1;
                    rightDice = Random().nextInt(6)+1;
                  });
                  showToast("Left dice: {$leftDice}, Right dice: {$rightDice}");
                },
                icon: Icon(Icons.play_arrow),
                label: Text("Next"),
              ),
            )
          ],
        ),
      ),
    );
  }
}

void showToast(String message){
  Fluttertoast.showToast(msg:message,
    backgroundColor: Colors.white,
    toastLength: Toast.LENGTH_SHORT,
    gravity: ToastGravity.BOTTOM,
  );
}


플러터 버전업이 되면서 ScaffoldMessenger.of(context)를 사용함

onPressed: (){ //버튼을 눌렀을때
  ScaffoldMessenger.of(context).showSnackBar(
    //SnackBar 구현하는법 context는 위에 BuildContext에 있는 객체를 그대로 가져오면 됨.
      SnackBar(
        content: Text('Like a new Snack bar!'), //snack bar의 내용. icon, button같은것도 가능하다.
        duration: Duration(seconds: 5), //올라와있는 시간
        action: SnackBarAction( //추가로 작업을 넣기. 버튼넣기라 생각하면 편하다.
          label: 'Undo', //버튼이름
          onPressed: (){}, //버튼 눌렀을때.
        ),
      )
  );
}


출처: https://learncom1234.tistory.com/23

'플로터(Flutter) > CheetSheet' 카테고리의 다른 글

이미지 처리  (0) 2023.01.17
focus  (0) 2023.01.17


확인할 것

- setState사용법 확인

- FloatingActionButton은 여러개 표현할 때 Stack으로 표현


import 'package:flutter/material.dart';

void main() {
  runApp(const MyApp());
}

class MyApp extends StatelessWidget {
  const MyApp({super.key});

  // This widget is the root of your application.
  @override
  Widget build(BuildContext context) {
    return MaterialApp(
      title: 'Flutter Demo',
      theme: ThemeData(
        primarySwatch: Colors.blue,
      ),
      home: const MyHomePage(title: 'Flutter Demo Home Page'),
    );
  }
}

class MyHomePage extends StatefulWidget {
  const MyHomePage({super.key, required this.title});

  final String title;

  @override
  State<MyHomePage> createState() => _MyHomePageState();
}

class _MyHomePageState extends State<MyHomePage> {
  int _counter = 0;

  void _incrementCounter() {
    setState(() {
      _counter++;
    });
  }

  void _decrementCounter(){
    setState(() {
      _counter--;
    });
  }

  @override
  Widget build(BuildContext context) {
    return Scaffold(
      appBar: AppBar(
        title: Text(widget.title),
      ),
      body: Center(
        child: Column(
          mainAxisAlignment: MainAxisAlignment.center,
          children: <Widget>[
            const Text(
              'You have pushed the button this many times:',
            ),
            Text(
              '$_counter',
              style: Theme.of(context).textTheme.headline4,
            ),
          ],
        ),

      ),
      floatingActionButton: Stack(
        children:[
          Align(
            alignment: Alignment(
              Alignment.center.x-0.15, Alignment.center.y + 0.35
            ),
            child: FloatingActionButton(
              onPressed: _incrementCounter,
              tooltip: 'Increment',
              child: const Icon(Icons.add),
            ),
          ),
          Align(
            alignment: Alignment(
                Alignment.center.x+0.4, Alignment.center.y + 0.35
            ),
            child: FloatingActionButton(
              onPressed: _decrementCounter,
              tooltip: 'Decrement',
              child: const Icon(Icons.remove),
            )
          )
        ],
      )
    );
  }
}


상속 문법(생성자에 유의해서 보길)

class Person{
  String? name;
  int? money;
  Person(this.name, this.money){}

  void status(){
    print("이름: $name , 골드: $money");
  }
}

class Hero extends Person{
  int? hp;
  int? mp;
  Hero(this.hp, this.mp, super.name, super.money);
  //생성자에서 중괄호 안에 내용이 없을 경우 생략해도 됨
  //단 생략할 경우 위 예시처럼 세미콜론 필수
  @override
  void status(){
    print("이름: $name , 골드: $money");
    print("hp: $hp , gold: $mp");
  }
}

class Magician extends Hero{
  String? skill;
  int? damage;
  Magician(this.skill, this.damage, super.hp, super.mp, super.name, super.money){}

  void magic(){
    print("Magic: $skill ,Dagmage: $damage!!");
  }
}


void main(){
  Person p1 = Person("Tim", 100);
  p1.status();
  Hero h1 = Hero(1,2,"Tim",100);
  h1.status();
  Magician m1 = Magician("Meteor", 999, 10,30,"Harry", 999);
  m1.status();
  m1.magic();
  m1.magic();
  m1.magic();
  m1.magic();
}


아래는 옛날 방식

class DialPhone{
  int? year;
  DialPhone(){
    print('이 전화기는 다이얼을 돌려서 전화를 겁니다.');
  }

  void whenCame(){
    print("1889년 발명");
  }
}

class ButtonPhone extends DialPhone{
  ButtonPhone(){
    print("이 전화기는 버튼을 눌러서 전화를 겁니다.");
  }

  @override
  void whenCame(){
    print("1963년 발명");
  }
}

class SmartPhone extends ButtonPhone{
  String? manufacturer;
  String? model;

  SmartPhone(String manufacturer, String model, int year){
    this.manufacturer = manufacturer;
    this.model = model;
    this.year = year;

    print("이 전화기는 터치를 해서 전화를 겁니다.");
  }

  @override
  void whenCame(){
    print("1993년 처음 등장");
  }
}

void main(){
  SmartPhone s1 = SmartPhone("제조사:삼성", "모델명:겔럭시 S20", 2020);
  print(s1.manufacturer.toString() + s1.model.toString() + s1.year.toString());

  s1.whenCame();
}


이번에는 유튜브 모바일과 데스크톱의 레이아웃이 다른 것처럼 반응형으로 웹앱의 Layout을 만드는 강의였다.


main.dart

import 'package:flutter/material.dart';
import 'my_page.dart';
void main() {
  runApp(const MyApp());
}

class MyApp extends StatelessWidget {
  const MyApp({Key? key}) : super(key: key);

  @override
  Widget build(BuildContext context) {
    return MaterialApp(
      theme: ThemeData(
        primarySwatch: Colors.deepPurple,

      ),
      home: MyPage(),
    );
  }
}


my_page.dart

- body를 ResponsiveLayout 위젯을 만들어 반응형으로 화면 구성

- ResponsiveLayout은 생성자에서 2개의 변수를 초기화 해야하므로 mobileBody, desktopBody를 매개변수로 넘겨줌

import 'package:flutter/material.dart';
import 'package:mild_2_youtube/responsive/desktop_body.dart';
import 'package:mild_2_youtube/responsive/mobile_body.dart';
import 'package:mild_2_youtube/responsive/responsive.dart';

class MyPage extends StatefulWidget {
  const MyPage({Key? key}) : super(key: key);

  @override
  State<MyPage> createState() => _MyPageState();
}

class _MyPageState extends State<MyPage> {
  @override
  Widget build(BuildContext context) {
    return const Scaffold(
      body: ResponsiveLayout(
        mobileBody: MobileBody(),
        desktopBody: DesktopBody(),
      ),
    );
  }
}


responsive.dart

- LayoutBuilder클래스를 사용해서 화면너비에 따라 모바일, 데스크탑용으로 화면layout을 바꿔주기 위해 사용

참고: https://api.flutter.dev/flutter/widgets/LayoutBuilder-class.html

- 제약조건을 거는데 최대 너비가 800이하일 경우 모바일, 이상일 경우 데스크탑 위젯 화면 보여줌

import 'package:flutter/material.dart';

class ResponsiveLayout extends StatelessWidget {
  const ResponsiveLayout(
      {Key? key, required this.mobileBody, required this.desktopBody})
      : super(key: key);

  final Widget mobileBody;
  final Widget desktopBody;

  @override
  Widget build(BuildContext context) {
    return LayoutBuilder(builder: (context, constraints) {
      if (constraints.maxWidth < 800) {
        return mobileBody;
      } else {
        return desktopBody;
      }
    }); //기기 전체가 아니라 위젯의 크기를 알아내기
  }
}


mobile_body.dart

- 모바일 화면구성

- 컬럼 내에서 listview를 사용할 때 expanded를 감싸서 공간의 범위를 제한해줌

import 'package:flutter/material.dart';


class MobileBody extends StatelessWidget {
  const MobileBody({Key? key}) : super(key: key);

  @override
  Widget build(BuildContext context) {
    return Scaffold(
      appBar: AppBar(
        title: Text('Mobile'),
      ),
      backgroundColor: Colors.deepPurple,
      body: Column(
        children: [
          Padding(
            padding: const EdgeInsets.all(16.0),
            child: Container(
              height: 300,
              color: Colors.deepPurple[400],
            ),
          ),
          Expanded( //컬럼 내에서 Listview사용할 때는 Expanded로 감싸줘야함, 안그러면 container의 height를 쓸 수 없음
            child: ListView.builder(
                itemCount: 10,
                itemBuilder: (context, index){
                  return Padding(
                    padding: const EdgeInsets.all(8.0),
                    child: Container(
                      color: Colors.deepPurple[300],
                      height: 120,
                    ),
                  );
                }),
          )
        ],
      ),
    );
  }
}


desktop_body.dart

- sidePanel의 너비를 300으로 고정하고 나머지는 너비를 주지않았고 리스트뷰를 expanded로 감쌈으로 해서 화면 크기 변화에 따라 1열의 너비만 변하는 것을 볼 수 있다.

import 'package:flutter/material.dart';

class DesktopBody extends StatelessWidget {
  const DesktopBody({Key? key}) : super(key: key);

  @override
  Widget build(BuildContext context) {
    return Scaffold(
      appBar: AppBar(
        title: Text('Desktop'),
      ),
      backgroundColor: Colors.deepPurple[200],
      body: Row(
        children: [
          Expanded(
            child: Column(
              children: [
                Padding(
                  padding: const EdgeInsets.all(16.0),
                  child: Container(
                    height: 300,
                    color: Colors.deepPurple[400],
                  ),
                ),
                Expanded( //컬럼 내에서 Listview사용할 때는 Expanded로 감싸줘야함, 안그러면 container의 height를 쓸 수 없음
                  child: ListView.builder(
                      itemCount: 10,
                      itemBuilder: (context, index){
                        return Padding(
                          padding: const EdgeInsets.all(8.0),
                          child: Container(
                            color: Colors.deepPurple[300],
                            height: 120,
                          ),
                        );
                      }),
                ),
              ],
            ),
          ),
          //side Panel
          Container(
            width: 300,
            child: ListView.builder(
                itemCount: 10,
                itemBuilder: (context, index){
                  return Padding(
                    padding: const EdgeInsets.all(8.0),
                    child: Container(
                      color: Colors.deepPurple[300],
                      height: 120,
                    ),
                  );
                }),
          )
        ],
      ),
    );
  }
}


요약 - 리스트 아이템을 선택하면 동물페이지가 뜨고 좋아요를 누를 수 있게 됨

주요 기능


main.dart

- 메인 페이지이며 리스트 제너레이터 사용법 확인

- navigator를 통해 animal_page로 넘어갈 때 animalData를 넘겨줌

import 'package:flutter/material.dart';
import 'package:mild_2_listview/animal_page.dart';
import 'package:mild_2_listview/model.dart';

void main() {
  runApp(const MyApp());
}

class MyApp extends StatelessWidget {
  const MyApp({Key? key}) : super(key: key);

  @override
  Widget build(BuildContext context) {
    return const MaterialApp(
      home: MyPage(),
    );
  }
}

class MyPage extends StatefulWidget {
  const MyPage({Key? key}) : super(key: key);

  @override
  State<MyPage> createState() => _MyPageState();
}

class _MyPageState extends State<MyPage> {
  static List<String> animalName = [
    'Bear',
    'Camel',
    'Deer',
    'Fox',
    'Kangaroo',
    'Koala',
    'Lion',
    'Tiger'
  ];

  static List<String> animalImagePath = [
    'image/bear.png',
    'image/camel.png',
    'image/deer.png',
    'image/fox.png',
    'image/kangaroo.png',
    'image/koala.png',
    'image/lion.png',
    'image/tiger.png'
  ];

  static List<String> animalLocation = [
    'forest and mountain',
    'dessert',
    'forest',
    'snow mountain',
    'Australia',
    'Australia',
    'Africa',
    'Korea'
  ];

  final List<Animal> animalData = List.generate(
      animalLocation.length,
      (index) => Animal(
          animalName[index], animalImagePath[index], animalLocation[index]));

  @override
  Widget build(BuildContext context) {
    return Scaffold(
        appBar: AppBar(
          title: const Text("ListView"),
        ),
        body: ListView.builder(
            itemCount: animalData.length,
            itemBuilder: (context, index) {
              //debugPrint(index.toString()+" : "+animalData[index].imgPath.toString());
              return Card(
                  child: ListTile(
                      title: Text(animalData[index].name),
                      leading: SizedBox(
                        height: 50,
                        width: 50,
                        child: Image.asset(animalData[index].imgPath),
                      ),
                    onTap: (){
                        Navigator.of(context).push(MaterialPageRoute(
                            builder: (context)=>AnimalPage(animal: animalData[index],)));
                        debugPrint(animalData[index].name);
                    },
                  ));
            }));
  }
}


animal_page.dart

- 넘겨받음 animal데이터로 page구현

- like_button패키기 사용(https://pub.dev/packages/like_button/install)

import 'package:flutter/material.dart';
import 'package:mild_2_listview/model.dart';
import 'package:like_button/like_button.dart';

class AnimalPage extends StatefulWidget {
  const AnimalPage({Key? key, required this.animal}) : super(key: key);
  //null 값을 가질 수 없는 this.animal에는 required를 붙여준다
  final Animal animal;

  @override
  State<AnimalPage> createState() => _AnimalPageState();
}

class _AnimalPageState extends State<AnimalPage> {
  bool isLiked = false;
  int likeCount = 0;

  @override
  Widget build(BuildContext context) {
    return Scaffold(
      appBar: AppBar(
        title: Text(widget.animal.name),
      ),
      body: Center(
        child: Column(
          mainAxisAlignment: MainAxisAlignment.center,
          children: [
            SizedBox(
                height: 200, width: 200, child: Image.asset(widget.animal.imgPath)),
            const SizedBox(
              height: 20,
            ),
            Text('It lives in ' + widget.animal.location,
            style: const TextStyle(
              fontSize: 18
            ),),
            const SizedBox(
              height: 20,
            ),
            LikeButton(
              size: 30,
                isLiked: isLiked,
                likeCount: likeCount,
            )
          ],
        ),
      ),
    );
  }
}


model.dart

- Animal클래스

import 'package:flutter/material.dart';

class Animal{
  final String name;  //final 은 runtime시에 값이 정해질 수 있기 때문에
  final String imgPath;
  final String location;

  Animal(this.name, this.imgPath, this.location);
}


1. Alt + Enter - 라이브러리 추가 등

2. Shift + Enter - 다음칸으로 커서 이동


1. 리스트뷰 vs 리스트뷰빌더

  - 리스트뷰와 리스트뷰빌더가 있는데 리스트뷰는 모든 리스트를 한 번에 불러오기 때문에 로딩이슈가 발생 할 수 있다.

  - 리스트뷰빌더는 필요한 것만 그때 그때 불러서 사용

2. 리스트뷰빌더예제

  - 리스트뷰형식에 터치를 하면 상세화면이 나옴

  - 주요기능은

    1) 리스트뷰 구현 - 리스트뷰빌더사용하였고 터치를 위해 GestureDetector사용

    2) 팝업창(상세화면) 구현 - showpopup이라는 함수를 만들어서 구현

    3)가로 세로윈도우가 바뀌었을 때도 반응형으로 동작 - description을 구현할 때 mediaquery 클래스 사용

import 'package:flutter/material.dart';

void main() {
  runApp(const MyApp());
}

class MyApp extends StatelessWidget {
  const MyApp({Key? key}) : super(key: key);

  @override
  Widget build(BuildContext context) {
    return const MaterialApp(
      home: ListViewPage(),
    );
  }
}

class ListViewPage extends StatefulWidget {
  const ListViewPage({Key? key}) : super(key: key);

  @override
  State<ListViewPage> createState() => _ListViewPageState();
}

class _ListViewPageState extends State<ListViewPage> {
  var titleList = [
    'Dentist',
    'Pharmacist',
    'School teacher',
    'IT manager',
    'Account',
    'Lawyer',
    'Hairdresser',
    'Physician',
    'Web developer',
    'Medical Secretary'
  ];

  var imageList = [
    'image/1.png',
    'image/2.png',
    'image/3.png',
    'image/4.png',
    'image/5.png',
    'image/6.png',
    'image/7.png',
    'image/8.png',
    'image/9.png',
    'image/10.png'
  ];

  var description = [
    '1.There are different types of careers you can pursue in your life. Which one will it be?',
    '2.There are different types of careers you can pursue in your life. Which one will it be?',
    '3.There are different types of careers you can pursue in your life. Which one will it be?',
    '4.There are different types of careers you can pursue in your life. Which one will it be?',
    '5.There are different types of careers you can pursue in your life. Which one will it be?',
    '6.There are different types of careers you can pursue in your life. Which one will it be?',
    '7.There are different types of careers you can pursue in your life. Which one will it be?',
    '8.There are different types of careers you can pursue in your life. Which one will it be?',
    '9.There are different types of careers you can pursue in your life. Which one will it be?',
    '10.There are different types of careers you can pursue in your life. Which one will it be?'
  ];

  void showPopup(context, title, image, description) {
    showDialog(
        context: context,
        builder: (context) {
          return Dialog(
            child: Container(
              width: MediaQuery.of(context).size.width * 0.7,
              height: 380,
              decoration: BoxDecoration(
                  borderRadius: BorderRadius.circular(10), color: Colors.white),
              child: Column(
                children: [
                  ClipRRect(
                      borderRadius: BorderRadius.circular(10),
                      child: Image.asset(
                        image,
                        width: 200,
                        height: 200,
                      )),
                  const SizedBox(
                    height: 10,
                  ),
                  Text(
                    title,
                    style: const TextStyle(
                      fontSize: 25,
                      fontWeight: FontWeight.bold,
                      color: Colors.grey,
                    ),
                  ),
                  Padding(
                    padding: const EdgeInsets.all(8),
                    child: Text(
                      description,
                      maxLines: 3, //최대 3줄까지 표현
                      style: TextStyle(fontSize: 15, color: Colors.grey[500]),
                      textAlign: TextAlign.center,
                    ),
                  ),
                  ElevatedButton.icon(
                      onPressed: () {
                        Navigator.pop(context);
                      },
                      icon: const Icon(Icons.close),
                      label: const Text('close')),
                ],
              ),
            ),
          );
        });
  }

  @override
  Widget build(BuildContext context) {
    double width =
        MediaQuery.of(context).size.width * 0.6; //반응형을 위해 디스크립션을 60%크기로
    return Scaffold(
      appBar: AppBar(
        title: const Text(
          'ListView',
          style: TextStyle(color: Colors.grey),
        ),
        backgroundColor: Colors.white,
        elevation: 0,
      ),
      body: ListView.builder(
        itemCount: titleList.length,
        itemBuilder: (context, index) {
          return GestureDetector(  //InkWell 도 사용가능
            onTap: () {
              debugPrint(titleList[index]);
              showPopup(context, titleList[index], imageList[index],
                  description[index]);
            },
            child: Card(
                child: Row(children: [
              SizedBox(
                width: 100,
                height: 100,
                child: Image.asset(imageList[index]),
              ),
              Padding(
                  padding: const EdgeInsets.all(10),
                  child: Column(
                    children: [
                      Text(titleList[index],
                          style: const TextStyle(
                              fontSize: 22,
                              fontWeight: FontWeight.bold,
                              color: Colors.grey)),
                      const SizedBox(
                        height: 10,
                      ),
                      SizedBox(
                          width: width,
                          child: Text(description[index],
                              style: TextStyle(
                                fontSize: 15,
                                color: Colors.grey[500],
                              )))
                    ],
                  ))
            ])),
          );
        },
      ),
    );
  }
}


+ Recent posts