이번에는 유튜브 모바일과 데스크톱의 레이아웃이 다른 것처럼 반응형으로 웹앱의 Layout을 만드는 강의였다.
 |
 |
main.dart
import 'package:flutter/material.dart';
import 'my_page.dart';
void main() {
  runApp(const MyApp());
}

class MyApp extends StatelessWidget {
  const MyApp({Key? key}) : super(key: key);

  @override
  Widget build(BuildContext context) {
    return MaterialApp(
      theme: ThemeData(
        primarySwatch: Colors.deepPurple,

      ),
      home: MyPage(),
    );
  }
}
my_page.dart
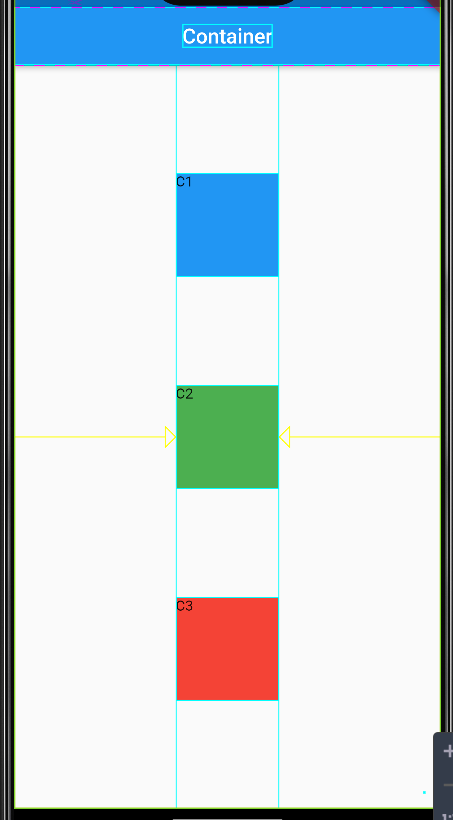
- body를 ResponsiveLayout 위젯을 만들어 반응형으로 화면 구성
- ResponsiveLayout은 생성자에서 2개의 변수를 초기화 해야하므로 mobileBody, desktopBody를 매개변수로 넘겨줌
import 'package:flutter/material.dart';
import 'package:mild_2_youtube/responsive/desktop_body.dart';
import 'package:mild_2_youtube/responsive/mobile_body.dart';
import 'package:mild_2_youtube/responsive/responsive.dart';

class MyPage extends StatefulWidget {
  const MyPage({Key? key}) : super(key: key);

  @override
  State<MyPage> createState() => _MyPageState();
}

class _MyPageState extends State<MyPage> {
  @override
  Widget build(BuildContext context) {
    return const Scaffold(
      body: ResponsiveLayout(
        mobileBody: MobileBody(),
        desktopBody: DesktopBody(),
      ),
    );
  }
}
responsive.dart
- LayoutBuilder클래스를 사용해서 화면너비에 따라 모바일, 데스크탑용으로 화면layout을 바꿔주기 위해 사용
참고: https://api.flutter.dev/flutter/widgets/LayoutBuilder-class.html
- 제약조건을 거는데 최대 너비가 800이하일 경우 모바일, 이상일 경우 데스크탑 위젯 화면 보여줌
import 'package:flutter/material.dart';

class ResponsiveLayout extends StatelessWidget {
  const ResponsiveLayout(
      {Key? key, required this.mobileBody, required this.desktopBody})
      : super(key: key);

  final Widget mobileBody;
  final Widget desktopBody;

  @override
  Widget build(BuildContext context) {
    return LayoutBuilder(builder: (context, constraints) {
      if (constraints.maxWidth < 800) {
        return mobileBody;
      } else {
        return desktopBody;
      }
    }); //기기 전체가 아니라 위젯의 크기를 알아내기
  }
}
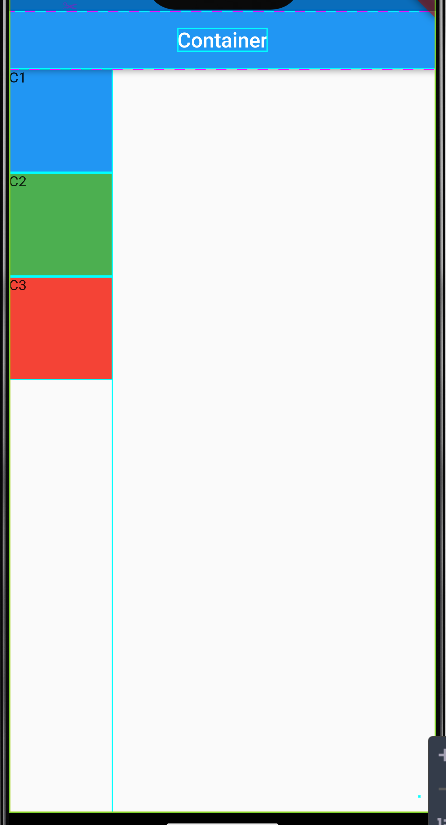
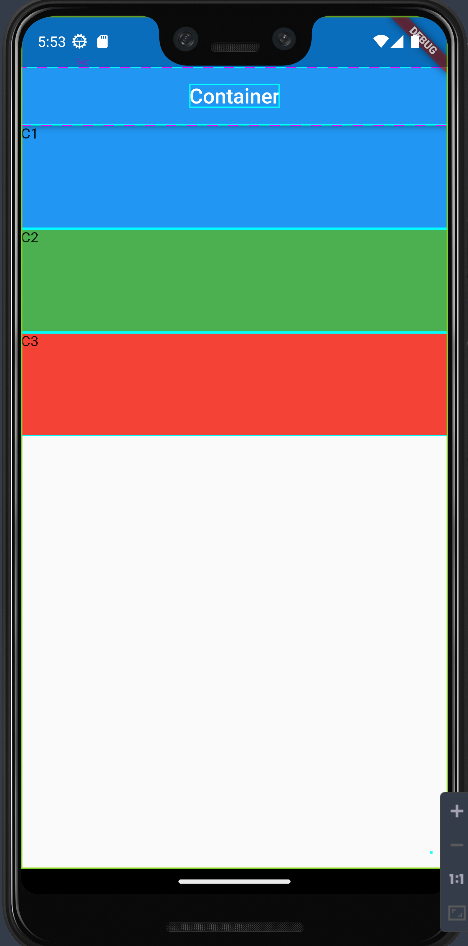
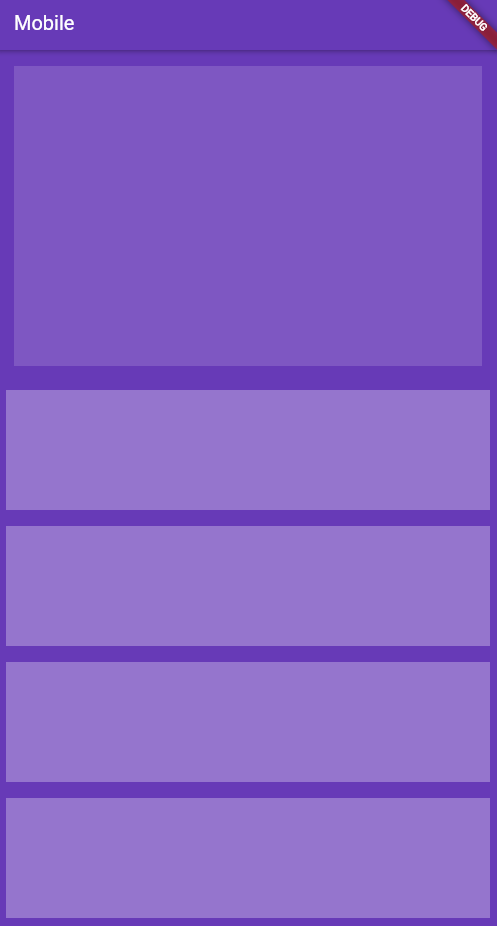
mobile_body.dart
- 모바일 화면구성
- 컬럼 내에서 listview를 사용할 때 expanded를 감싸서 공간의 범위를 제한해줌
import 'package:flutter/material.dart';


class MobileBody extends StatelessWidget {
  const MobileBody({Key? key}) : super(key: key);

  @override
  Widget build(BuildContext context) {
    return Scaffold(
      appBar: AppBar(
        title: Text('Mobile'),
      ),
      backgroundColor: Colors.deepPurple,
      body: Column(
        children: [
          Padding(
            padding: const EdgeInsets.all(16.0),
            child: Container(
              height: 300,
              color: Colors.deepPurple[400],
            ),
          ),
          Expanded( //컬럼 내에서 Listview사용할 때는 Expanded로 감싸줘야함, 안그러면 container의 height를 쓸 수 없음
            child: ListView.builder(
                itemCount: 10,
                itemBuilder: (context, index){
                  return Padding(
                    padding: const EdgeInsets.all(8.0),
                    child: Container(
                      color: Colors.deepPurple[300],
                      height: 120,
                    ),
                  );
                }),
          )
        ],
      ),
    );
  }
}
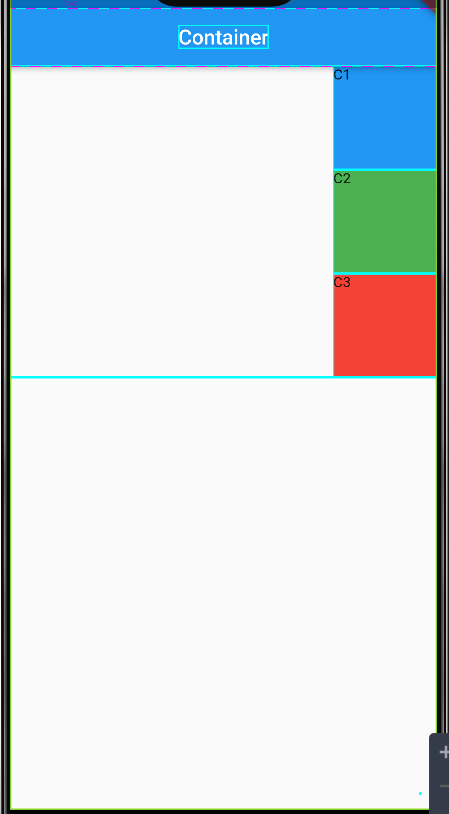
desktop_body.dart
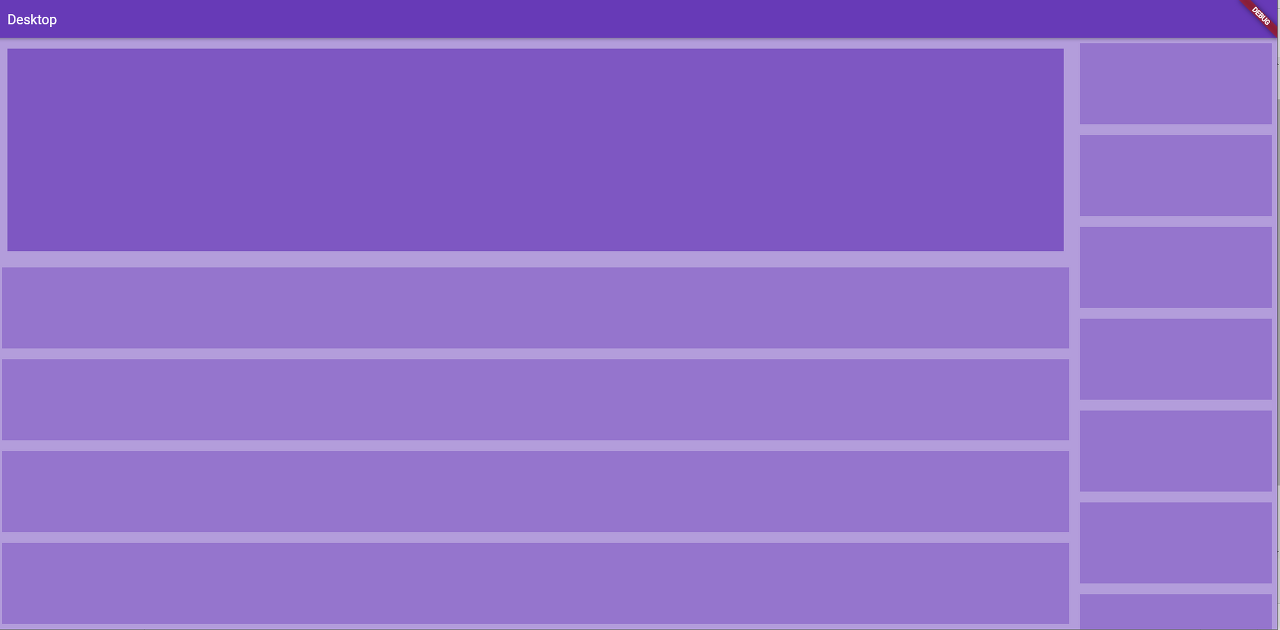
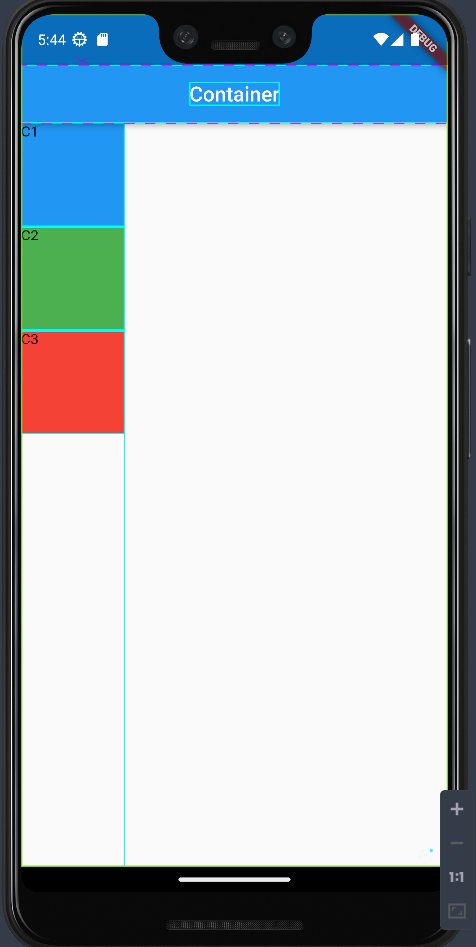
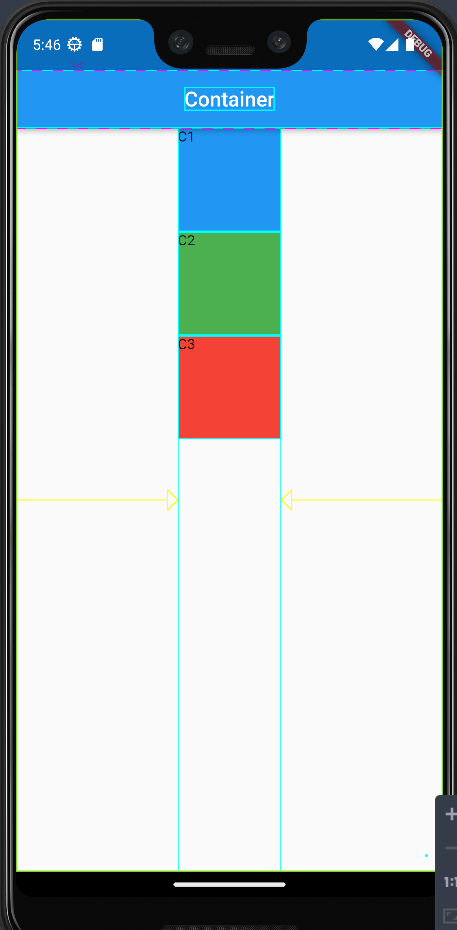
- sidePanel의 너비를 300으로 고정하고 나머지는 너비를 주지않았고 리스트뷰를 expanded로 감쌈으로 해서 화면 크기 변화에 따라 1열의 너비만 변하는 것을 볼 수 있다.
import 'package:flutter/material.dart';

class DesktopBody extends StatelessWidget {
  const DesktopBody({Key? key}) : super(key: key);

  @override
  Widget build(BuildContext context) {
    return Scaffold(
      appBar: AppBar(
        title: Text('Desktop'),
      ),
      backgroundColor: Colors.deepPurple[200],
      body: Row(
        children: [
          Expanded(
            child: Column(
              children: [
                Padding(
                  padding: const EdgeInsets.all(16.0),
                  child: Container(
                    height: 300,
                    color: Colors.deepPurple[400],
                  ),
                ),
                Expanded( //컬럼 내에서 Listview사용할 때는 Expanded로 감싸줘야함, 안그러면 container의 height를 쓸 수 없음
                  child: ListView.builder(
                      itemCount: 10,
                      itemBuilder: (context, index){
                        return Padding(
                          padding: const EdgeInsets.all(8.0),
                          child: Container(
                            color: Colors.deepPurple[300],
                            height: 120,
                          ),
                        );
                      }),
                ),
              ],
            ),
          ),
          //side Panel
          Container(
            width: 300,
            child: ListView.builder(
                itemCount: 10,
                itemBuilder: (context, index){
                  return Padding(
                    padding: const EdgeInsets.all(8.0),
                    child: Container(
                      color: Colors.deepPurple[300],
                      height: 120,
                    ),
                  );
                }),
          )
        ],
      ),
    );
  }
}
'플로터(Flutter) > 기본' 카테고리의 다른 글
| (코딩쉐프) 조금 매운 맛 2강 (버튼에 따라 증감하는 앱) (0) | 2023.01.16 |
|---|---|
| (코딩쉐프) 조금 매운 맛 1강 (상속) (0) | 2023.01.13 |
| (코딩쉐프) 순한 맛 시즌 2 - 리스트뷰빌더(페이지 데이터 넘기기) (0) | 2023.01.12 |
| 안드로이드 스튜디오, Dart 편집 단축키 (0) | 2023.01.12 |
| (코딩쉐프) 순한 맛 시즌 2 - 리스트뷰빌더 (0) | 2023.01.12 |